Search This Blog

Saturday, January 21, 2012

Banana Walnut Cake


Banana Walnut Cake, so simple! This cake is moist and delicious, and a slice would go perfectly warmed up with a little butter smeared on the top to go with your morning coffee.

You will need:
2 cups Flour
1 1/2 tsp Baking soda
1/2 tsp Salt
1 cup Raw Sugar
1/4 cup Oil
4 ripe Bananas, mashed
1/4 cup Soy Milk (or water)
1 tsp Vanilla
1/4 - 1/2 cup of crushed Walnuts or nut of choice (Optional)


Pre-heat oven to 180 C. Lightly grease a 9-inch round cake tin for a cake, or a loaf pan for bread. In a small bowl, combine the flour, baking soda and salt. In a separate large bowl add the sugar, oil bananas, soymilk/water and vanilla. Combine this easily in a blender or whisk vigorously, stir in nuts.
Add the flour mixture, stirring just until wet.

Bake for 45 to 50 minutes, or until a toothpick comes out clean.

Enjoy

Saturday, January 7, 2012

Lazy Nachos

When most people think of nachos... they think of mounds of grilled cheese over corn chips which are topped with mince, salsa, guacamole and sour cream...

Yeah, I'm WAY too lazy for that most of the time!
This is one of my laziest meals


You will need: (Recipe generously feeds two people)
1 packet of original dorito chips, or corn chip of choice
2 avocados, mashed with 1 teaspoon of lemon juice
1 300g jar of mild/medium/hot salsa

Mince:
Whatever vegetables you have in the fridge, plus a tin of re-fried beans and a packet of taco spice blend
I use -
1 small onion
2 tablespoons of garlic
1/4 cup of broccoli
1/4 cup of carrot
1/4 cup of spinach
1 tin of lentils, drained
1 tin of refried beans
1 packet of taco spice blend

To make the mince:
Add onion, garlic, broccoli, carrot and spinach to a food processor and blend until mince-like
add blended vegetable mixture with a few tablespoons of oil, and packet of taco spice blend to a hot pan and cook until soft (5-10 minutes)
Add lentils and re-fried beans and mix until well incorporated, and your mince is ready!


To assemble:
Organise dorito chips onto a place, top with mince, then top with salsa, and top with fresh mashed avocado, done!

If you want sour cream... and can't be bothered making a tofu one, you could always grab some tofutti sour cream, it's equally as lazy and works a treat.

I don't even miss grilled cheese on my nachos :)

Pumpkin and Tofu pizza

This is a pretty simple pizza which me and Mr. Monster love, if you love pumpkin... and you love tofu... give it a try!

You will need (per pizza):
1 pizza base of choice - I prefer thin
1 cup of bite sized pieces of butternut pumpkin
1 cup of shredded fresh spinach
1/4 cup of extra firm tofu, crumbled
1/4 cup of sliced red onion

Tomato Paste for base (I usually get one with garlic added... or add some minced garlic)
oil for roasting
1 teaspoon of dried mix herbs

Place diced pumpkin in a bowl and lightly drizzle with oil
lay out pumpkin on an oven tray and roast at 180C for 15-20 minutes or until pumpkin is roasted nicely
While pumpkin is roasting, throw crumbled tofu and spinach into the same bowl with mixed herbs - very lightly drizzle with oil and toss to coat - set aside (it should look like the picture below)


Cover pizza base with tomato paste and top with red onion
gently place cooked pumpkin on pizza and throw spinach mixture on top
bake in oven at 180C for roughly 15 minutes or until spinach has wilted.
Crack some sea salt and pepper over the pizza
slice and serve - enjoy!

Saturday, December 10, 2011

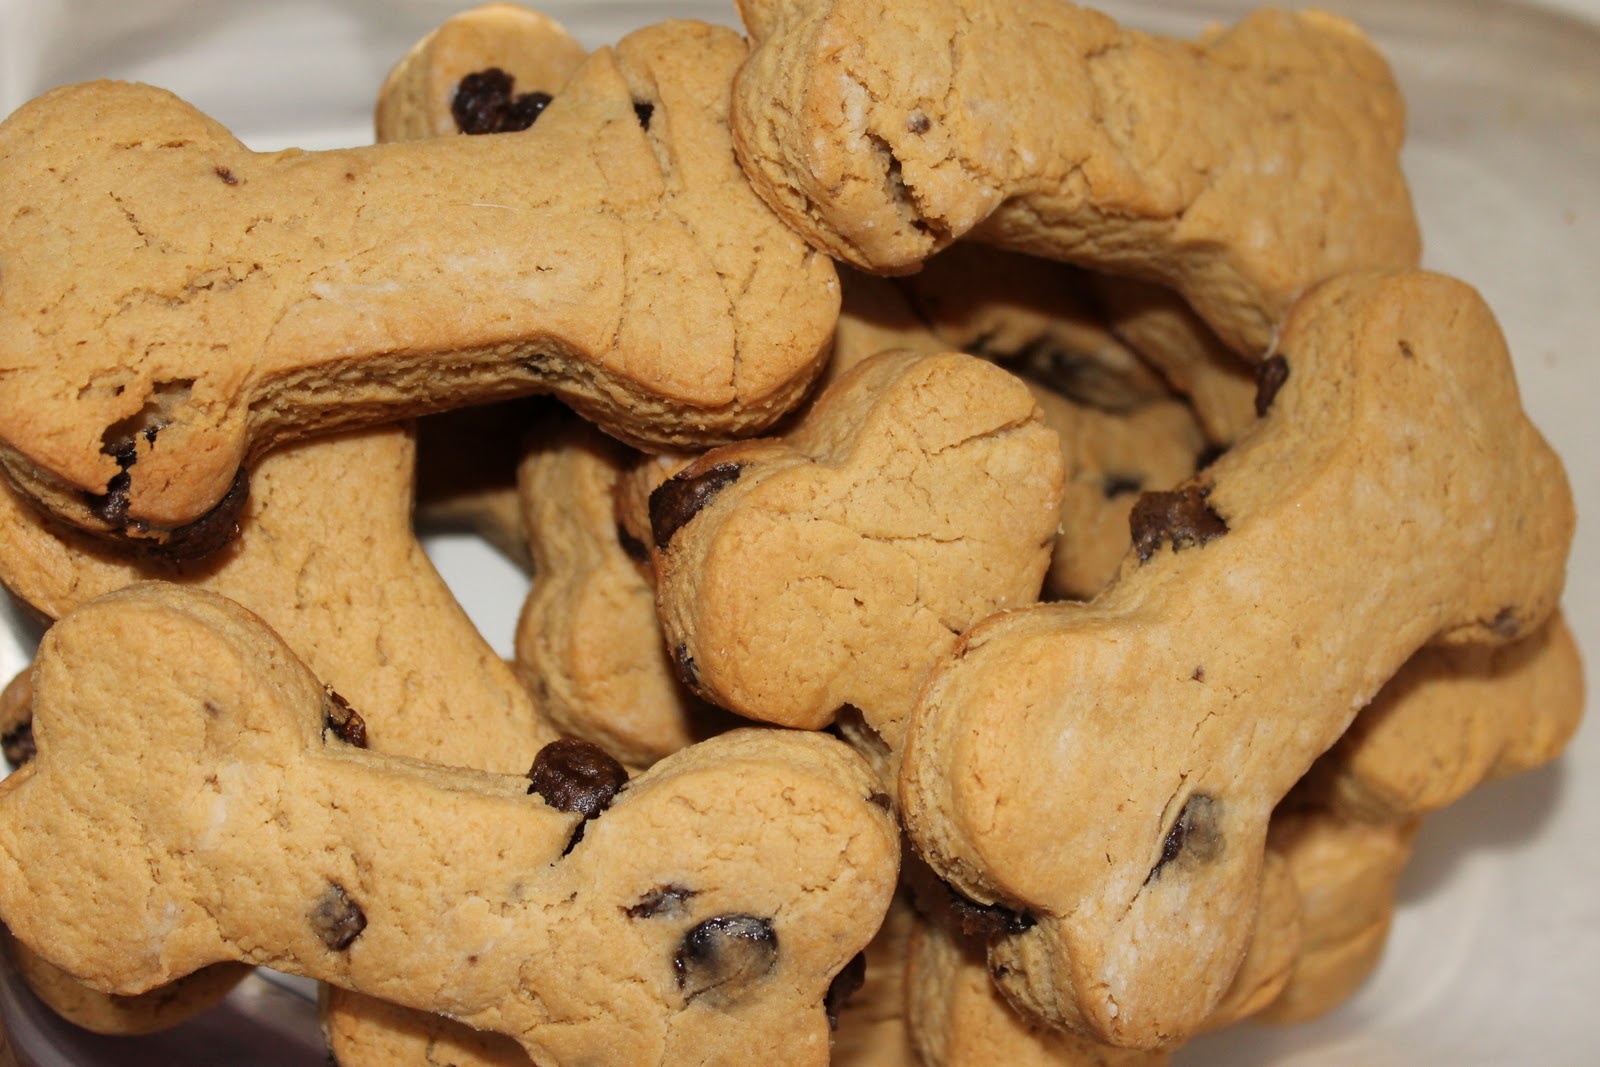
Savoury Yeast Cheesy Garlic Herb and facon Dog Biscuits

Dodge was less of a fan of these than the peanut butter cookies. In saying that he did still eat them! I personally thought the smell of these baking was incredible, and have been eying them off myself.

Recipe makes about 18 biscuits, depending on the size of your cookie cutter and how thick you make them.

You will need:
1 heaped cup of flour
1 cup water
1 tablespoons Garlic Powder
1/4 cup of fresh parsley, chopped finely
1 tablespoon baking powder
3 tablespoons of fake bacon pieces, finely diced
3 tablespoons of sesame seeds
1/4 - 1/2 cup of Nutritional Yeast flakes

1. Preheat oven to 180ºC.
2. Combine all but the water in a bowl and gently whisk together until evenly combined - add water and mix until dough consistency
3. Roll out the dough on a clean, floured work surface to about .5cm thickness. Cut out biscuits with your cookie cutter and place on a lined baking sheet. These biscuits don’t spread/melt much at all so it's fine to place them close together. Bake for 15 - 30 minutes (depending on the size of your biscuit) or until golden brown. Transfer to a wire rack to cool.

Peanut butter & Carob Dog Biscuits

Hello blog world, it's been a while since I've been on!

I've actually been a pretty busy lady. We recently rescued a 12 month old Great Dane, Dodge - He's just so lovely!


So, for my first post since welcoming him into our little fur family, I decided I'd better blog about some dog treats! He loves carob... and he absolutely loves peanut butter....  he loves treats...so it makes sense that he would love Peanut butter & Carob Dog Biscuits!

These are perfectly safe for people to eat - although you'll probably find they're much less sweet than the kind of cookies you're used to eating - but if grandad or the kids get into them, you don't have to worry!

Recipe makes about 14 biscuits, depending on the size of your cookie cutter and how thick you make them.

You will need:
1 cup peanut butter
1 cup soy milk
2 tablespoons agave syrup
1 heaped cup of plain flour
1 tablespoon baking powder
1 scant teaspoon ground cinnamon
1/2 cup of dog chocolate treat buttons, roughly chopped

1. Preheat oven to 180ºC. Cream together the peanut butter, milk and agave syrup, gently fold in carob chunks
2. Add the mixture to the remaining dry ingredients and stir until you form a stiff dough (you may have to use your hands). If you find the dough is a bit too wet you can add flour until the dough is to a cookie consistency.
3. Roll out the dough on a clean, floured work surface to about 1cm thickness. Cut out biscuits with your cookie cutter and place on a lined baking sheet. These biscuits don’t spread/melt much at all so it's fine to place them close together. Bake for 15 - 30 minutes (depending on the size of your biscuit) or until golden brown. Transfer to a wire rack to cool.


ta daaa - dodge absolutely loves these!

Wednesday, November 2, 2011

Creamy vegetable pies

With vegan puff pastry... anything is possible!
These were simple, yet tasty!
For 6 muffin sized pies, you will need:
3 sheets of frozen puff pastry

filling:
2 cups of soy milk
1 cup of diced frozen vegetables
1/2 onion, diced
1/2 cup of finely diced broccoli
1 clove of garlic
1 cup of fresh spinach leaves, finely chopped
4 tablespoons of vegan butter
4 tablespoons of plain flour
1 teaspoon of mustard
3 tablespoons of nutritional yeast
salt and pepper to taste (IMPORTANT)
teaspoon of dried mixed herbs

Preheat oven to 200C

To make sauce: melt butter in a pan over medium heat
whisk in flour to form a roux
whisk in soy milk, nutritional yeast, mustard, herbs, salt and pepper and set to the side.

In a pan, fry onion, garlic and broccoli until soft, combine spinach until wilted, add this along with the diced frozen vegetables to the sauce mixture - this will be your filling.
If you would prefer it runnier, add more soy milk.

Pastry shells:
Slice each sheet of thawed puff pastry into square quarters
Place 6 of these squares neatly into a muffin tray to create the bottom of your pie shell (make sure you have greased tray extremely well!) Gently push the center of the pastry into the muffin tray.
With the remaining 6 squares, find a circular object which will fit just inside the square to create the lid of your pie (should be about a cm wider than the muffin cavity) I found a large nesquik tin was PERFECT. Use this as a template to cut out 6 circular pieces of puff pastry.

Place cooled filling inside uncooked puff pastry shell and neatly place lid on top
use a fork to push the lid and base together firmly, and brush with soy milk - top with sesame seeds (optional)

Place in oven for 20-30 minutes or until golden brown.

Enjoy

Monday, October 31, 2011

Vegan MOFO: Last post - HAPPY HALLOWEEN

Well, it's the end of Vegan MOFO, I've had a blast, and found many new blogs which I've enjoyed!
I thought I would use my final post to show you all my pumpkin carving journey!

1: finding a decent pumpkin!
 2: Scooping out it's guts, transferring an image onto the pumpkin, and starting to carve it
 3: Cleaning up the cuts so they're all nice and neat!
 4: Success!

Happy halloween guys, and happy MOFO-ing :)